
Garage door weatherstripping is essential in sealing the gaps around your doors and windows to create an optimal indoor environment in your garage and home. It can also improve the garage’s energy efficiency and usability.
You may need to install new weatherstripping on your garage door if it is insufficient, worn or damaged. Understanding the benefits, types and factors to consider when choosing whether stripping will help you make an informed decision with a positive return on investment.
What Is Weatherstripping?
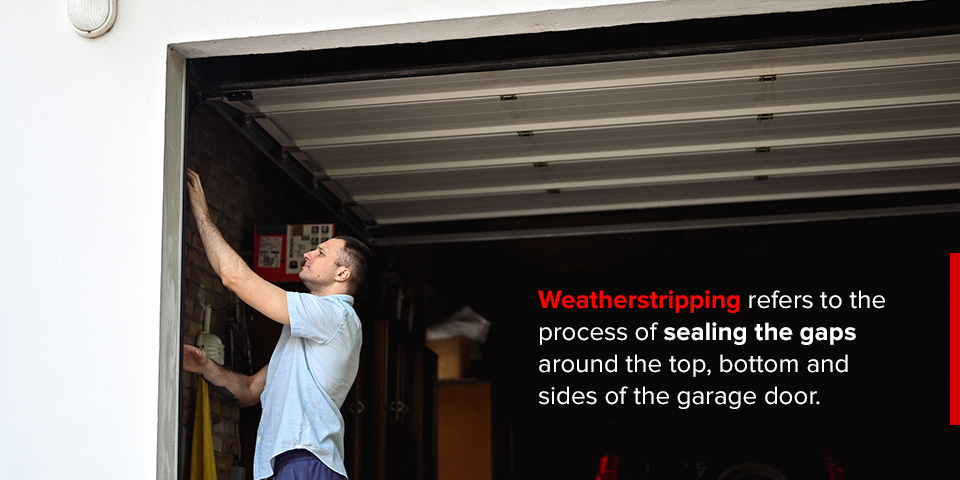
Weatherstripping refers to the process of sealing the gaps around the top, bottom and sides of the garage door. It involves adding a seal that lines the garage door frame to prevent the entry of unwanted external elements, like water, debris, bugs, dirt and dust. Without weatherstripping, your home is more vulnerable to extreme temperatures, and you may notice increased utility bills.
Garage door weatherstripping is available in various materials with distinct properties, advantages and disadvantages. These include:
- Rubber: Rubber is a classic weatherstripping choice, available in different densities and thicknesses to suit different climates. It’s the best choice for areas with freezing winters because it remains flexible for extended periods.
- Vinyl: This affordable weatherstripping option this great for keeping drafts and moisture out. It’s resistant to mold and mildew growth and ideal for installation in rainy, humid or windy climates.
- Silicone: This material is superior in preventing the entry of air, water, dirt and dust. Silicone is highly durable and remains flexible, making it effective in extreme environmental conditions.
- Brush seals: These comprise tough metal or synthetic bristles that fill the gaps between your garage and the floor. They’re perfect for uneven garage doors and help regulate the temperatures inside the garage by keeping warm air in and cold air out.
- Foam (closed-cell): This material is a lightweight and flexible polyethylene or polyurethane ideal for sealing the gaps between garage doors and floors. It provides superior garage insulation but may not be as durable as other weatherstripping materials.
- Metal: Metal weatherstripping is a heavy-duty option that is incredibly durable and suitable for areas with freezing temperatures and heavy snowfall. Steel and aluminum are popular metal weatherstripping options, but ensure they’re coated against rust and corrosion for longevity.
Types of Weatherstripping for Garage Doors
Weatherstripping for garage doors can be categorized into three main types. Learn more about each type below.
Bottom Seals
Also known as door sweeps, these are long strips of rubber or vinyl attached to the bottom of your garage door to seal the gaps between the door and the floor. They’re readily available in a standard shape that fits the bottom of most modern doors.
Door sweeps are relatively easy to install using a steel, aluminum or PVC retainer. However, if you have a wooden garage door, you may need an aluminum or galvanized fastener to make your door compatible with them. They can be adjusted for uneven thresholds. To avoid the drag, opt for automatically retracting door sweeps that also increase durability.
Threshold Seals
Unlike door sweeps, threshold seals are attached to the floor instead of the garage door. They fill the gaps between the floor and garage door but often must be combined with a bottom seal to keep out all the elements. Nonetheless, threshold seals effectively keep water, dust and debris out of your garage while helping maintain the indoor temperatures.
Threshold seals are made from durable rubber, vinyl or aluminum, making them solid and sturdy enough to drive over without damage. They’re the best if your garage door meets the floor asymmetrically or the driveway slopes toward the garage.
Tension Seals
Also known as the V strip, it’s weatherstripping shaped like a V to create a tight seal along the garage door’s length. They’re available in aluminum, copper or stainless steel materials shaped to securely attach to the sides and top of the garage door.
Tension seals are relatively easy to add to your system. When properly installed, they are invisible and blend into many surfaces. However, they can only be installed on flat and smooth surfaces and may increase the garage door’s resistance.
The Benefits of Weatherstripping for Garage Doors
Weatherstripping has many aesthetic and functional advantages for your garage. It’s essential to choose the right weatherstripping and have it installed and maintained correctly so it can continue serving you for the long term.
The following are the main benefits of weatherstripping your garage door:
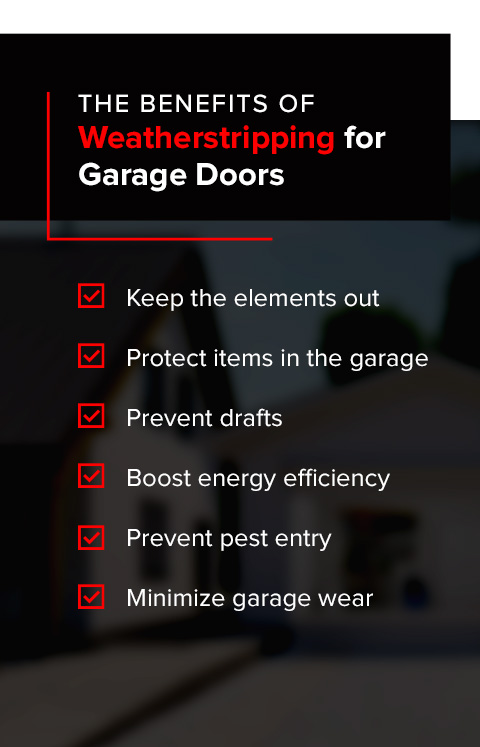
- Keep the elements out: Weatherstripping prevents snowmelt, rain, dust, hail, wind, dirt and debris from seeping into your garage. This protects your garage and home’s interior from water damage and the formation of mold and mildew and prevents the wear and tear of the doors and floors.
- Protect items in the garage: A weatherproof garage door keeps elements and pests out that could damage the belongings in your garage. It’s especially effective in protecting items that could be negatively impacted by moisture because gaps at the bottom of your door can let in dampness.
- Prevent drafts: Cold air or drafts can enter through the gap between your garage door and the floor, causing temperature imbalances. Weatherstripping prevents drafts inside the garage, maintaining a comfortable and pleasant space usable for various entertainment and workshop applications.
- Boost energy efficiency: Weatherstripping keeps uncomfortably warm weather out during the summer months and improves the effectiveness of insulation against cold temperatures in the winter. This minimizes your home’s heating and cooling energy losses, leading to significant energy cost savings.
- Prevent pest entry: Weatherstripping deters pests, preventing them from wreaking havoc in your home or destroying the belongings stored in your garage. Keeping pests out of your garage saves you the money you may otherwise need to spend on pest removal services and replacing your possessions.
- Minimize garage wear: When water enters your garage, it freezes, causing ice damage to the floors and accelerating the door’s wear and tear. Water pipes running through the garage are vulnerable to bursting when exposed to extremely cold temperatures and freeze damage.
How Do I Know If I Need Weatherproofing?
Weatherstripping typically lasts and remains usable for two to three years after installation. However, annual inspections are necessary to determine whether it’s still as effective as when it was first installed. Below are telltale signs you need to add new or replace your garage door’s weatherstripping:
- Visible damage: If you notice cracks, rips or visible wear and tear, the weatherstripping likely needs updating. Look for less obvious indications, like brittleness, flaking or warping. Rust and corrosion around your garage door can also be a sign.
- Drafts or air leaks: Do you feel drafts seeping into your garage from the bottom, top or sides of the door? You probably require new weatherstripping.
- Moisture infiltration: Check for puddles of water forming around or near the base of the garage door after precipitation. This is a sign your current weatherstripping is underperforming.
- Difficulty closing the door: Overly worn weatherstripping can cause improper alignment and resistance when closing your garage door, and you likely need to upgrade.
- Light gaps: If you notice a stream of light around the garage door, the weatherstripping may be damaged or worn.
While you can evaluate your weatherstripping yourself, partnering with garage door experts helps you identify other potential issues with your garage doors. While at it, they can conduct preventive garage door maintenance to ensure it’s ready for the harsh winters.
How to Install Garage Door Weatherstripping
Adding or replacing weatherstripping on your garage door can be a do-it-yourself project, especially if the door is working well. Nonetheless, working with professional garage door experts ensures your weatherstripping is installed effectively for longevity.
The following are general instructions for installing any weatherstripping to your garage door.
1. Take Your Door’s Measurements
Measuring your door before investing in weatherstripping ensures you get enough material to seal your garage door entirely and provide you with a positive return on your investment.
Measure the width, the length and the thickness between the floor and the door to determine how many weatherstripping pieces you need. Use a tape measure to get accurate and precise measurements for a snug fit of the weatherstripping.
2. Gather Installation Supplies
Collecting your weatherstripping installation materials and supplies beforehand ensures the process goes smoothly. Some of the must-have installation supplies include the following:
- Tape measure
- Cleaning supplies
- Drill or screwdriver
- Screws or nails
- Construction adhesive (for threshold seals)
- Utility knife or scissors
- Caulk and caulk gun
- Weatherstripping kit
- Gloves
3. Clean the Surface
Clean your garage floors and wipe the door frame to remove dirt and debris. This helps with the proper adhesion of the weatherstripping. You can go the extra mile to wipe down the floor and garage door with a degreaser if the surfaces are oily or greasy. Cleaning the surfaces also ensures longevity by minimizing the risk of bumping.
4. Install Weatherstripping
You need to cut your weatherstripping to the exact size of your garage door for a perfect fit. You don’t want weatherstripping too long or short, preventing proper functioning.
To correctly install your weatherstripping, follow the manufacturer’s instructions closely. Most DIY-friendly options come with adhesive backing, so you can simply peel and stick it to the top, bottom and sides of the door.
Start attaching the weatherstripping from the center and move outwards to avoid wrinkling and bubbling. If your weatherstripping requires screwing or nailing into place, be sure to use finishing nails every few inches to secure it. Aluminum and galvanized nails are the best because they don’t easily corrode or rust.
Installing threshold seals requires more precision, so you want to mark the floor with chalk or a permanent marker. Carefully apply the construction adhesion along the edges where the seal will sit, then place the threshold seal and press it into the adhesive. Give your the threshold strip at least a day before driving over it.
5. Test and Adjust As Needed
You want to ensure your weatherstripping works as intended without jamming or damaging it. Start by opening and closing the garage door to check that it’s oriented properly and doesn’t catch on the weatherstripping. With the door closed, inspect the seal for any gaps from the inside.
Other Ways to Weatherproof Your Garage Door for Winter
While weatherstripping is an effective method of garage door weatherproofing with many benefits, there are other ways you can prepare it for the winter.
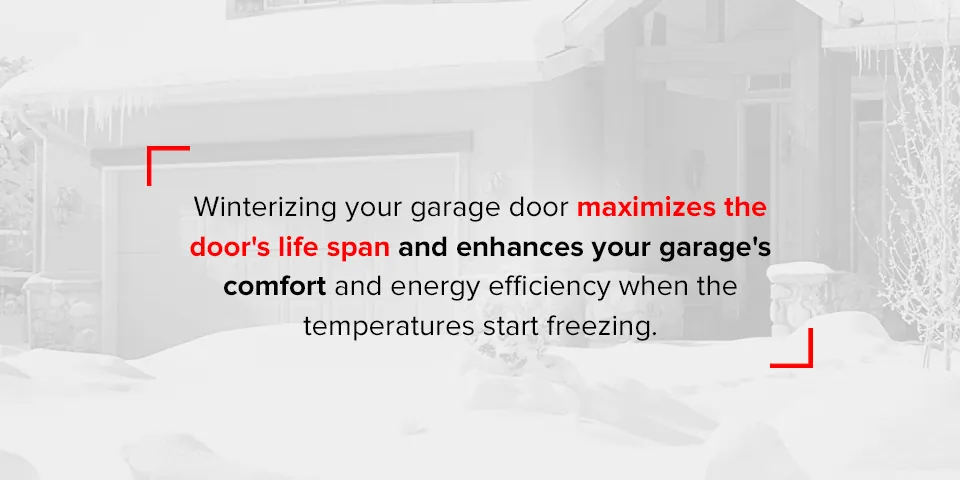
Winterizing your garage door maximizes the door’s life span and enhances your garage’s comfort and energy efficiency when the temperatures start freezing. The following are practical tips for winterizing your garage door:
- Schedule regular maintenance: Before the start of the winter, inspect your garage door, its tracks, opener and safety sensors to ensure they’re working optimally. Perform necessary tuneups to prevent minor issues from worsening as the snow packs around different parts.
- Lubricate moving parts: Metal garage door parts like springs, hinges and rollers need regular maintenance and lubrication to keep them running smoothly. Avoid common household lubricants and stick to non-silicone options that don’t quickly freeze or collect dirt and debris.
- Add insulation: Most modern garage doors have built-in insulation to keep the garage warm and prevent moisture buildup. If you have an older model door, you should invest in insulation to minimize the risk of moisture buildup and freezing, which can prevent your garage door system from operating correctly.
Frequently Asked Questions
Here are some commonly asked questions and answers about weatherstripping and garage door winterization methods.
How Long Should Garage Door Weatherstripping Last?
Good quality weatherstripping typically lasts between two and three years. Its actual lifespan is determined by the type and material of the weatherstripping, the elements it’s exposed to, the traffic through the door and how often it is opened and closed. Regular inspection and maintenance of the weatherstripping may ensure it lasts longer.
Do I Need to Weatherproof My Garage Door?
Yes, you need to weatherproof your garage door to keep the rain, snow and cold temperatures outside during the winter. Weatherproofing makes your garage more comfortable and livable while protecting your home’s interior and belongings.
When Should You Replace Weatherstripping on the Bottom of a Garage Door?
If your weatherstripping turns hard and brittle, it is due for replacement. Other signs include cracks, rips and tears. You should also plan for replacement if you see a light at the bottom of your garage door or feel drafts.
Reach out to BlackHawk Garage Door for All Your Garage Door Maintenance Needs

While you can install weatherstripping yourself, contacting a professional is a worthwhile investment because they can handle other garage door repairs with expertise and precision. At BlackHawk Garage Door, we offer comprehensive garage door services, including installation, maintenance and repair in Baldwin, Wisconsin, Bloomington, Minnesota, and the surrounding areas.
Contact us today to schedule weatherstripping installation and your other maintenance needs.